So I thought I would post it on my blog with better photos of the cards for anyone else that might be interested.
Feel the Heat – Heat Embossing Techniques Part 1
The main focus of this class is to learn basic and some advanced embossing techniques. The cards made will be simple and just a means of completing the look of the finished piece rather than leave the class with smaller sample/reference pieces.
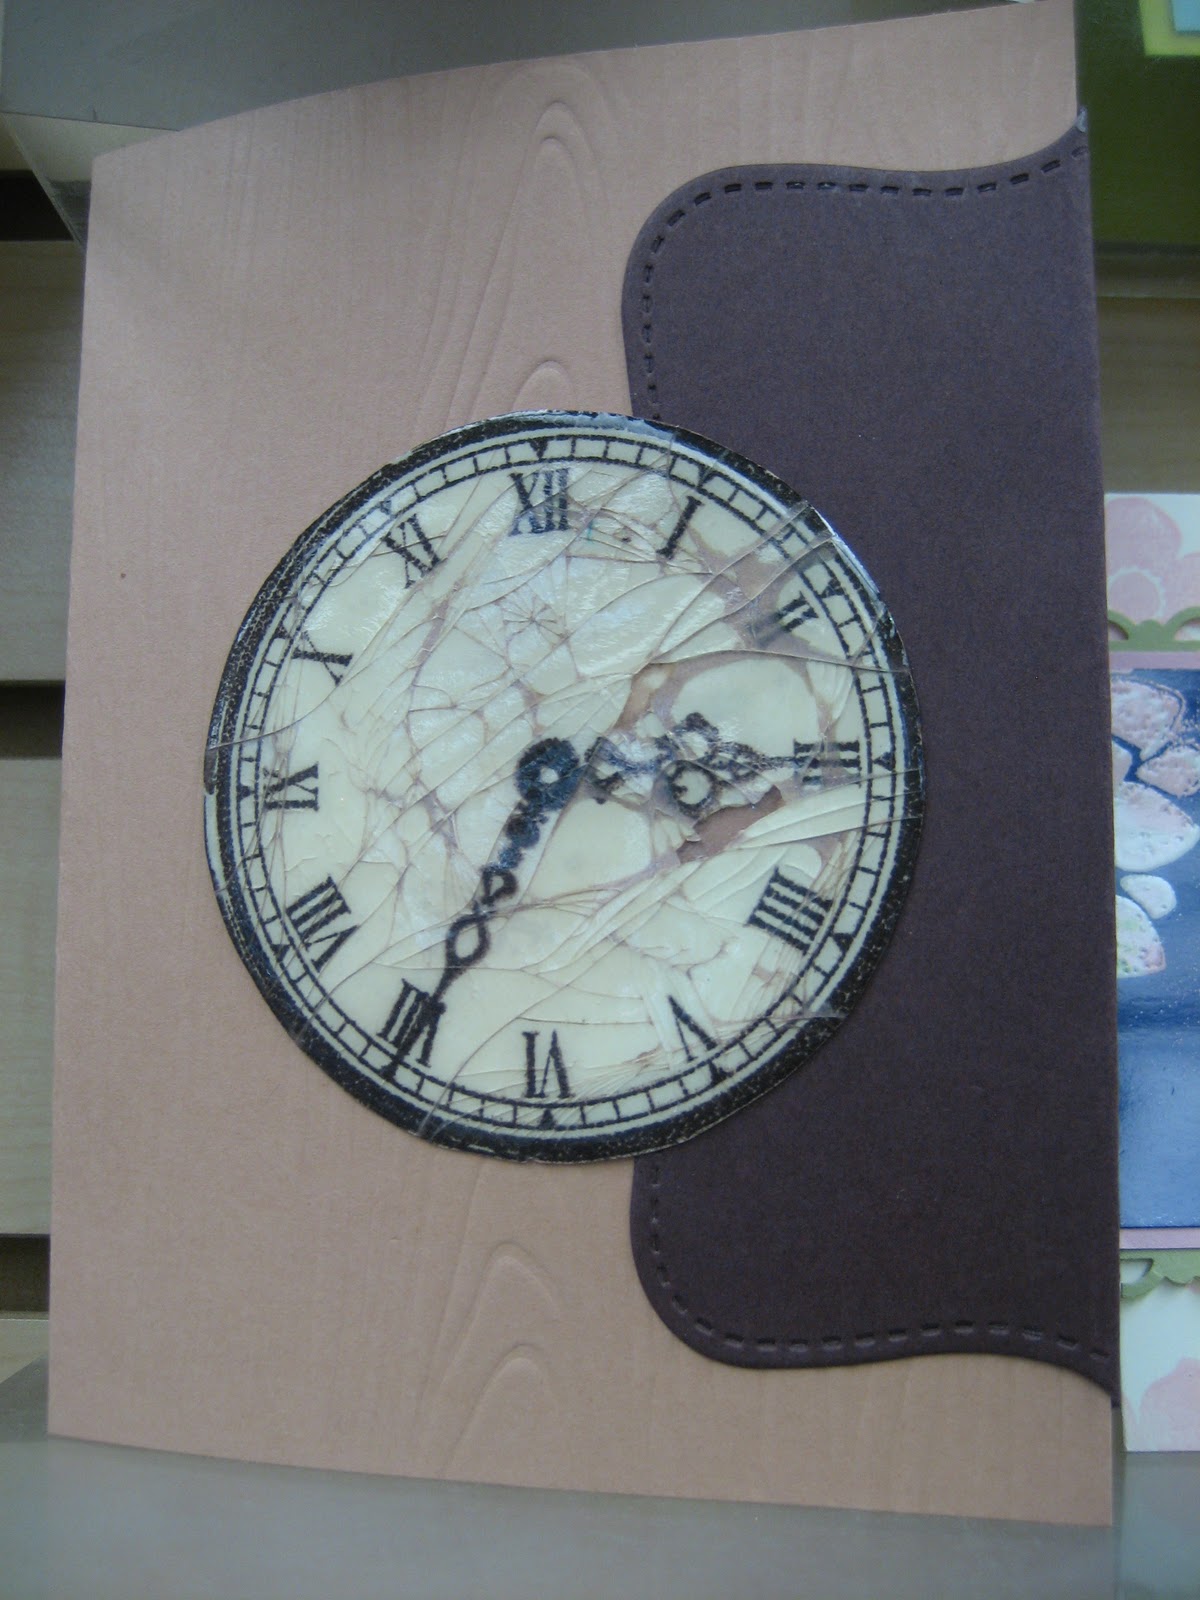
Cracked Glass
Supplies:
Sandy Lion Clock Face stamp set
PTI Wood Grain texture plate
SU! Sizzix Top Note Die
Vanilla, Dark Brown, Tan cardstock
Early Espresso, Versamark, distressing ink
UTEE
Sponge
Pop dots, sticky strip
1. Stamp large face clock on Vanilla cardstock and trim.
2. Apply Versamark to entire clock face.
3. Apply 1 layer of UTEE (Ultra Thick Emboss Enamel?) & place in pie plate. Heat from below until the UTEE starts to melt – then heat from above. This is done so that the large UTEE “grains” don’t get blown off the piece.
4. Let cool for a few seconds.
5. Repeat steps 2, 3 & 4 - TWO more times for a total of 3 coats.
6. Place clock in the freezer and while waiting assemble the card base as per example.
7. Remove clock from the freezer and bend piece to crack it. Rotate and bend so that the cracks are going in different directions.
8. If stuff falls off don’t worry - you can apply more UTEE, heat it again and re-crack or just go with it like in my close up below.

9. Add distress ink with a sponge. I have to admit that I did damper my sponge a bit to get that "marbled" look beneath my cracks.
10. Assemble card base.
11. Add clock face to card using sticky strip or pop dots – glue stick will NOT work.
Emboss Resist

Supplies:
Flourishes Cherry Blossom, Thank You stamps
Kraft cardstock card base
Blushing Bride, Pear Pizzazz, Versamark ink
White Gel Pen
White Detail EP
1. Using Old Bag/Emboss Pillow rub all over KRAFT card base front.
2. Stamp Cherry Blossom and Thank You with versamark.
3. Add White EP –fine detail embossing powder is used whenever embossing words and fine lined images.
4. Heat and let cool.
5. Using dauber/sponge/blender pen add pink and green to the Cherry Blossom image. This is what I call "quick" colouring and I don't worry about "colouring in the lines"!

6. Using White Gel Pen add lines around the border of the card front.
Faux Metal

SU! Perfect Punches, Heard From the Heart stamp set
SU! Scalloped oval punch
Silver, Olive Green, Light Blue cardstock & Blue multi patterned paper
Olive Green Ribbon
Versamark
Detail Silver EP
Pop dots, sticky strip
1. Apply versamark to the SILVER cardstock paper.
2. Cover with Detail Silver EP
3. Heat
4. Repeat steps 1, 2 & 3 for a SECOND or even THIRD coat and while HOT press stamp image into it.
5. Let cool.
6. Punch out image using coordinated punch.

7. Assemble card as per example.
Note: If using a punch be careful not to apply too much embossing powder or the piece will be too thick and may not fit through the punch – in that case simply hand trim your piece.
Emerging Colour

Supplies:
SU! Fabulous Flowers, Punch Bunch stamp sets
SU! Scalloped Square, SU! Scalloped Edge punches
Strip of Glossy White, Vanilla card base, Pink matting strip, Green scalloped edge
Blushing Bride, Pear Pizzazz, Concord Crush, TOP BOSS tinted embossing ink
Detailed Clear EP
Pop dots, sticky strip
1. Randomly stamp pink flowers on VANILLA CARD BASE front.
2. Randomly stamp pink flowers and green stems on GLOSSY WHITE piece.
3. Using Old Bag/Emboss Pillow rub all over GLOSSY WHITE piece.
4. Using Versamark stamp Large Flower image randomly over GLOSSY WHITE piece.
5. Apply Detail Clear EP to GLOSSY WHITE piece making sure to cover all the large flower stamped images.
6. Heat and let cool.
7. Apply dark ink to entire area using a swiping “direct to paper” method. Using Kleenex tissue (and a bit of spit) remove excess ink from the embossed flowers by gently rubbing the area.

9. Assemble card as per example.


hello, Marie
ReplyDeletethat's fantastic and perfect for a new stamper like me.
Thanks for sharing!
Greetings Regina