Showing posts with label Tutorials. Show all posts

Wednesday, March 14, 2012

Use your stuff!

I'm cleaning out my craft room again and while I do this I'm re-evaluating some of my craft stuff.

I have a lot of stamps, tools and supplies and I hardly use some of them! 

My local scrapbooking store - Scrap Arts - will take some of this stuff off my hands for store credit.  How awesome is that!!

While I go through my neglected craft tools and supplies I thought I'd start a feature called "Use your stuff!" to help me re-learn how to use some of it and also decide if I still needed the tool or supply item.

Today's post is about the SCORE BOARD tool. 

I have several and I like different ones for different reasons and every time a new one comes out I feel compelled to buy it.  But really I just need to use the one(s) I have!

I like the Scor-Pal for the self healing mat that sits right inside and I especially like the Scor-Buddy for taking along in my craft tote. But the bone folder thingy that comes with it doesn't work for me so I've used a stylus with it. 


I like the Martha Stewart Score Board for the 1/8" score lines (right across the board) and the envelope template included (it slides under the board for storage).  I really like that it has stickers with card sizes and where to score, box sizes and envelope sizes too and a flip up storage compartment.  So no instructions to hunt for when you're trying to make something! And again I use a stylus with mine not the bone folder thingy it comes with. 


I like the Stampin' Up! Simply Scored one because it comes with 3 place markers and a stylus - YAY! and now there is an add on Simply Scored Diagonal Plate.  This sits on the score board and allows you to score up to 12x12 paper. .
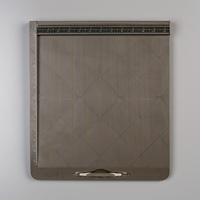
Simply Scored - by Stampin' Up!
I don't have this one but I am very tempted to buy it because it has all the features I like...

but I think I'll pass on it for now since I already own 2 others.

Now getting on to using a score board tool....

I'm pretty sure if you've got one you've probably got the hang of using it for scoring cards but I've been using mine to make envelopes lately and I'm loving it.

I made up some sample envelopes using coloured printer paper.  I'm very visual and I  love to have samples that I can look at!


One of the things I found was that the envelopes are quite a bit bigger than they need to be for the cards they're meant for.  I guess that's not really a bad thing if you've got a thicker card (with lots of layers/embellishments) that doesn't fit in the standard A2 envelope. But I sell my cards and these don't fit in the standard sized cello envelopes.

Now if you have 3D stuff on your cards - like this card I made at a Scrap Arts Make and Take - you might want something with room so that the 3D part doesn't get flattened.


I found this awesome BLOG POST by Kim Duran on how to make a box-like envelope for heavily embellished standard sized cards.

 See how nicely the card fits in there....

Not sure how this would go through the mail - maybe someone can comment on that - but it's perfect for this kind of card and hand delivering!

If you've got some score board tips or comments to share I'd love to read them!

Until Next Time!
Marie

Wednesday, August 24, 2011

Have you seen this???

I just love buying little paper flowers to use on projects - but I'm hoarding them because I don't ever want to "run out"! 

OR maybe I feel like the person I'm making the card for isn't "special" enough for me to use up my stash!

Either way I know I need let go a bit and use up more of my stuff. 

It will be a lot easier for me now since I found some awesome videos on how to make your own "prima" type flowers.

I know there are many videos out there and it can get overwhelming jumping from link to link but I came across THIS ONE and I especially LOVE this one because you can make it with pretty much any circular, star or flower type punch or shapes cut from your dies or cricut machines!

Check THIS video out from Jules (aka Jannaviles)

Until Next Time!
Marie

Saturday, May 14, 2011

Have you got a Grad?

Do you have a student graduating this year?

I do and maybe that’s why I’ve noticed lots of fun projects to make for grad decorating, cards and gifts lately.

I'm posting some links below but if you find something "grad" that might be helpful to others please post a comment here (with the link) and we'll all check it out!

Check out these links for some fun papercrafting graduation ideas:

Graduation Card using scalloped square die

Graduation fun fold card

Graduation Mini Album

Graduation treat boxes

Here’s another fun fold version of the Grad Card

Graduation Money Card

Here’s a Pop Up Grad card tutorial and template.

Graduation Cap Box

Here’s a tutorial on how to make an origami Grad Cap money box.

This is an easy one if you have a Cricut and the Wild Card cartridge.

This one is a cute little grad cap pop up card.

Here’s a link to another blog with more fun Graduation Ideas.


How about some cute treat ideas!


Click HERE to see how these above pop treats are made!
 Click HERE to get the printable version for these picks above.


Photos from Pinterest.


Until Next Time!
Marie

Father's Day Shirts

Father’s Day is coming up and so I thought I’d post a repeat of the shirt folding tutorial I did awhile ago.

I think this little shirt stuck on a card makes a fun and easy Father's Day card.


Click HERE to see the post where I showed a tutorial on how to make the shirt.

If your man is not a "shirt and tie" kind of guy what about a Hawaiian shirt?


Just change the paper to suit your guy!

I think these shirts are great to  make any occasion masculine card.  Try one for youself and see!
Until Next Time!
Marie

Monday, April 25, 2011

Ribbon Flowers

Ribbon flower embellishments are so popular right now.  Not just for paper crafting but for home decor and clothing too!

I use them and wear them and I love them!

Tatertots and Jello: Guest Post -- make a Nautical, Anthro-inspired Necklace!!

You can jazz up any project with a few of these and they are easy to make yourself too.

I love THIS POST because it shows 16 different flowers and links to tutorials on how to make them!

 Until Next Time!
Marie

Friday, December 31, 2010

I LOVE this scrunchy ribbon look!


I've seen the scrunchy ribbon "look" done different ways but I like this one the best. 

Why?  It doesn't use sewing to gather and it's a pretty gather rather than just laying and scrunching your ribbon right on to sticky strip.

The method I used in the photo above is easy and quick - that is once you get the hang of it! 

Click HERE to see the video by the talented Mary Fish on how to do it yourself.   I LOVE her sample card too!

Marie's TIPS:
When doing this technique here are a few things to keep in mind.
1.  Cut a long piece of ribbon - for a 4 1/4 card front piece I cut a piece of ribbon 11 inches long.

2.  Secure the non-pulling side of the ribbon.  I did this by using a lighter to sear the ribbon end.  Check out THIS POST to see what I mean. 


If you don't do this you may pull your thread all the way through and end up with flat ribbon with a line through it.  This happened to me the first time doing this!

3.  Fray the ribbon end you're going to pull from quite a bit so you can get a hold of a thread.  I have long nails and I guess my finger tips are not that strong so I needed to use tweezers to get the thread started.


Click HERE for the sewn scrunchy ribbon look.


Click HERE for the scrunch look with sticky strip.

Which one do you like best?

Tuesday, August 24, 2010

A CASE of a Card!

I CASED a card from Mary Brown.

Instead of the dark gray accents that Mary used in her card I went with Chocolate Chip. 

 I didn't have the same greeting so I stamped this one from the Afterthoughts stamp set from Stampin' Up!

Check out this bow!  If you know me you know that I am a knot girl - I cannot (well could not) tie a bow if my life depended on it.

Can you believe that I actually tied this one myself?  Isn't it beautiful???


I followed THIS TUTORIAL from Ilina Crouse but I didn't have a cute husband on hand this morning to help me. 

Let me tell you it was quite a challenge and I could NOT do it with my own fingers. 

So I took out some recycled plastic (this is an old notebook cover) and made myself a template of my own two index fingers!

Check this out!


You can stop laughting now - I know it looks weird - it works and it's FREE!


Tuesday, March 23, 2010

Paper Rose Tags

Have you seen these paper roses?
I just love them!
It does take a bit of practice to make them! This was one of my first ones.


I love to ink the edges.

I'm not going to re-invent the wheel and show you how to I made these.
Instead I'm going to send you to Maria's blog for a tutorial on how to make these


Thursday, February 25, 2010

Unmounting Wheels

Yesterday I posted on the Crafty Storage blog how I store my unmounted rubber wheel stamps.

I started unmounting my wheels a few years ago after seeing a blog post from Laura at Inky Dinky Doo.

To see that tutorial and learn more about unmounting rubber wheel stamps click HERE.


Thursday, February 4, 2010

Stampin' Royalty Challenge #5

I saw this little basket on Angie Juda's blog and just knew I had to make it for this week's Stampin' Royalty challenge - Anything But a Card.


I decided to try it out with my recently acquired Sale-A-Bration DSP 6x6 pack.It's so easy - just take a 6x6 piece of two-side patterned paper and then score at 2" on all 4 sides.

On the corner pieces score a diagonal so that it folds inwards.

Punch a hole in each of the 4 diagonal folds and insert a binder ring - or you can thread ribbon through the holes instead!

2/6/10 ETA: Angie has just posted a video on how to make this basket in 3 different sizes. So if you are visual learner check THIS out.

Thanks Angie for the inspiration!


Tuesday, December 8, 2009

Glitter Button Tutorial

Here's another cool idea I saw in the November Stampin' Success issue - Glitter Buttons!

1. First you need a button with a bit of a well in it.
Here I'm using a Stampin' Up! button. Apply a glue dot to the well.

I used the Zots Medium glue dots and apply it to the button well by turning
over the glue dot onto the button.
2. Once I have it on the button I press the glue dot into place from the back side.3. Next I dip the button upside down into glitter
(here I'm using Stampin' Up! Dazzling Diamonds).

5. I pull the button out and then tap off the excess onto the lid (so I don't waste any glitter!).

6. Any button will do and you can use any colour glitter to mix and match with your projects!


(sorry about this last one it's out of focus and I totally missed the well!)