Showing posts with label Embossing. Show all posts

Sunday, September 2, 2012

Fire and Ice Christmas Technique Class Sneak Peek #2

September 2, 2012

Here is the third sneak peek for the 2nd card we'll be making in this Fire and Ice class.


Please see my previous post HERE to view the other sneak peeks for this class.

This is a Heat Tool technique Christmas themed class offered exclusively at Scrap Arts in North Vancouver.

If you're in the area please call the store at 604-980-8811 to reserve your spot - limited spaces available.

Friday, August 31, 2012

Fire and Ice Christmas Technique Class

August 31, 2012

Today I'm working on the samples for my upcoming class at Scrap Arts (604-980-8811).

It's been so long since I taught a class and it's taking me forever to get these samples sorted out - there is just too much other stuff going on at home right now!

Anyway here are the first 2 sneak peeks from this class called Fire and Ice.

This will be a technique based Christmas/Winter themed class.


We will be making 3 cards and 1 project using the Heat Tool - hence the "Fire" - and with snow and glitter "Ice" added for the Christmas/Winter theme.

I will be teaching this class ONLY twice at Scrap Arts - one in September and the other in October (same class 2 different dates).

Please call the store at 604-980-8811 to register ASAP - space will be limited!

I hope you see some of you soon!

Thursday, March 15, 2012

Cutting up your embossing folders? What the heck!

I just saw that Sandy MacIver cut up her Finial Press embossing folder - check THIS out! 

If you watch her video she shows you how she cut hers up around the 7 minute mark.

I thought this was very extreme and not something that I would have ever thought to do with mine.

So I Googled it....and you know what other people do it too!

Dawn Griffith also did this HERE where she shows how she cut an oval out of her Petals a Plenty embossing folder. 

You don't have to cut up your folder - you can achieve the same effect by cutting a chipboard mat to use on top of your folder in your sandwich.  Click HERE to see how that is done.

Maybe I'm out of the loop here but I had no idea that crafters were cutting up their folders.  Did you?

I don't think I could do that to mine - I like them the way they are.

If you've done this and would like to share please leave a comment here.

Until Next Time!
Marie

Saturday, February 25, 2012

Full Card Photos from my Embossing Folder Class at Scrap Arts

Today I taught an embossing folder technique workshop at Scrap Arts in North Vancouver.

The purpose of this class was to take our embossing folder embossing to the next level and learn some new tips, tricks and techniques.

I focused on 2 basic techniques - "Ink the Folder" and "Ink the Embossing" .

The first card we made used the "Ink the Folder" technique.  Very easy - just ink the top inside of your embossing folder (usually the side with the company name printed on it) with dye ink, make your sandwich and run it through your machine. 

Tip: Some like to use a brayer for this technique but it's really not necessary - you can just swipe your ink pad right onto the folder!

Tip: You can use any combo of ink and paper for this technique but for a 3D effect I really like the way this technique looks when you use different tones of the same colour together.

I used a piece of Certainly Celery and inked SU! Square Lattice with Old Olive ink.
This next card uses the same "Ink the Folder" technique but this time we used Versamark ink, then added some custom gold glitter embossing powder and heat embossed it. 

I guess you could call this Double Embossing with HEAT!

Tip: To make your own custom glitter embossing powder just use a bit of detail glitter and add it to Detail Clear Embossing powder.  It gives you a bit of glitter without too much of the sheen from regular gold embossing powder. I keep mine in a clear container and I shake it before use every time.


To ensure that the embossing pattern matches up I ran the top of the card base as well as a layer of pink cardstock (4 1/4 x 5 1/2) through the Big Shot with the Bloom Dots folder. 

Tip: I find it easy to stack and keep the 2 pieces together but you can use removeable adhesive if you like between the 2 pieces of cardstock to ensure that they don't move while going through the machine.

After I heat embossed the pink layer I cut it down to size (3 3/4 x 5).  I like to do it this way so it doesn't transfer versamark (or dye ink if I'm using that) onto the white card base layer (where I don't want it) and also it gives me a little extra paper to hold onto if I'm heat embossing.  

Tip: Remember to use your anti-static pillow on your coloured cardstock piece BEFORE running it through the folder with the versamark ink.  

And because I know you are going to ask me...this digital image is from Sugar Nellie and it's called Bambino.

Tip: Use a piece of silicone to clean up your glitter mess!  The Big Shot Texturz Silicone mat works really well!


The 3rd card we made used the "Ink the Folder" technique again but this time we did some paper piecing as well.  We started off with a piece of white cardstock and using a glue stick, added some star punch outs. 

Tip: This is a great way to make your own patterned paper and use up scraps!

We inked the Number Collage folder with Crumb Cake (Kraft) ink and ran it through the Big Shot.


The last card we made used the "Ink after Embossing" technique with an OMIT chipboard piece and a bit of dry embossing!

You can make your own custom OMIT pieces with chipboard in any shape you like or custom shaped to match up with your favourite stamps.
For this card I made a rectangle shaped card front sized frame and cut the chipboard with a craft knife.
Tip: If you're using recycled cereal or tissue boxes you may need to glue 2 pieces together to get enough thickness for this technique to be effective.


For this card I ran the white cardstock piece through the Big Shot using the Textile embossing folder and the OMIT piece on top of the folder.

The OMIT chipboard piece goes ON TOP of the folder NOT inside it. 

The sandwich I used in my Big Shot was MPP (multi-purpose platform) with both tabs, then embossing folder with cardstock inside, chipboard OMIT piece on top of the folder, then clear plate on top.

The idea behind this technique is simple - where the sandwich is thicker the embossing will be more prominent, where there is a space there won't be the same pressure leaving an omit area on the piece being embossed.

 
Tip: If you want your OMIT chipboard piece to stay in a specific place or if you are making a lot of the same piece - use removeable adhesive to attach your chipboard to the outside of your embossing folder.

After the piece was embossed we used a stylus and ruler (from the back) to outline the rectangle and give it more definition.

Tip: This technique works well with embossing folders that have more detailed and repetitive patterns.

Swipe your ink pad lightly over the front of the embossed piece of cardstock so that the ink catches on the raised parts only. 
I like using this technique because it gives me control over where I want the embossing and leaves me space to stamp directly on the same piece of cardstock!

.

I hoped you enjoyed this detailed posts and tips! 

Until next time...
Marie

Wednesday, January 18, 2012

Masculine Birthday or Father's Day Gift Card Holder

I made this gift card "wallet" today.

It's perfect for money or gift cards! 
Until Next Time!
Marie

Monday, January 16, 2012

Embossing Folder Technique Class Sneak Peeks

Here are some sneak peeks from my upcoming class at Scrap Arts.


If you're local and you're interested in taking this class please call the store at 604-980-8811

Until Next Time!
Marie

Tuesday, June 7, 2011

Feel the Heat Part 2 Card Photos

Here are the full photos of the cards I made in my Feel the Heat Part 2 Card Class.

Double Emboss and Melted Ribbon Flower
Sorry some of the ribbon bits to need to be trimmed off! 
The leaf is just the oval punch folded in half and then scored with my scissors. 
I then used a darker shade of green ink to sponge and drag on some definition.

Mosaic or Broken Tile Technique
I used Sahara Sand to sponge on the "grout" lines.
The image is stamped on Very Vanilla but the greeting is stamped on
Whisper White and then sponed with Sahara Sand ink.


Stained Glass Diorama
This hummingbird was coloured using Stampin' Up! Markers but
 I used COPIC colouring techniques to get this blended look.
A close up of the stained glass part - the image is heat embossed using black pigment ink and then clear embossing powder. 
The image is then coloured FROM BEHIND for a more subtle look.
Until Next Time!
Marie

Monday, May 9, 2011

Feel the Heat Part 2 Class

I just dropped off my card samples for the Feel the Heat Part 2 class.  You can see them in person at Scrap Arts in North Vancouver and register for the class at the same time.  It's Saturday June 1 - 3 pm (space is limited).

In this class we'll be doing embossed mosaic, stained glass, double embossing and using the heat tool to make a melted ribbon flower.

As an added bonus to this class I'll be demonstrating how to make your own heat embossed invitation wording on velum using the computer printer.

Until Next Time!
Marie

Saturday, April 30, 2011

Feel the Heat Part 2 Sneak Peeks

More sneak peeks from my upcoming Heat Embossing Technique class called Feel the Heat Part 2.


I'll be teaching this class at the North Vancouver Scrap Arts store on June 4th 1 - 3 pm.

Call the store today at 604-980-8811 to reserve your space!

Until Next Time! Marie

Friday, April 29, 2011

Feel the Heat Part 2

A while ago I taught a class on Heat Embossing techniques called Feel the Heat.  Click HERE to see that original post.

Right now I'm working on some samples for my upcoming Feel the Heat Part 2 class in June.

Here's a sneak peek of one of the cards we'll be making.


Until Next Time!
Marie

Tuesday, April 19, 2011

New Loot!

Yesterday I was in Scrap Arts -  my favourite LSS (Local Scrapbooking Store) - and I picked up all of these goodies!

The embossing folders are new from Craft Concepts.  It's an Australian company and they make limited run embossing folders.


I tried them out this morning and they emboss beautifully.  Nice deep and clean embossing!


The stamps are from Autumn Leaves.


Shelley's got a good selection of both right now but they won't last long! 

If you're on the North Shore and in the area you should check it out! 

Scrap Arts is located at 175 East 3rd St in North Vancouver or call the store today for your scrapbooking needs 604-880-8811.

Thanks for stopping in today!

Why don't you check back with me tomorrow and see what I'm up to?  I've got a surprise coming up.....

Ok so I'm not very good at keeping secrets - I'll just tell you that I've got some BLOG CANDY coming up!!

Saturday, January 22, 2011

Heat Embossing Tool

At today's class one of the ladies (LA) had a new heat tool that I'v never seen before and now I think I must get myself one.

I've always had the torpedo styled heat tools (Marvy Uchida) but the Heat It one has a handle, is very quiet and it doesn't blow the bits around.  Great for working with UTEE!

This is it:


Does anyone else have this tool?  If so, what do you think of it?

Feel the Heat - Embossing Technique Class Part 1

At my class today I was asked to share my instructions for the cards we made.  Unless it's a kit or project class I don't normally do this and I did't have anything to hand out.  But I do make notes for each class with photos - a cheat sheet - to help me teach the class and not forget anything.

So I thought I would post it on my blog with better photos of the cards for anyone else that might be interested.

Feel the Heat – Heat Embossing Techniques Part 1


The main focus of this class is to learn basic and some advanced embossing techniques. The cards made will be simple and just a means of completing the look of the finished piece rather than leave the class with smaller sample/reference pieces.

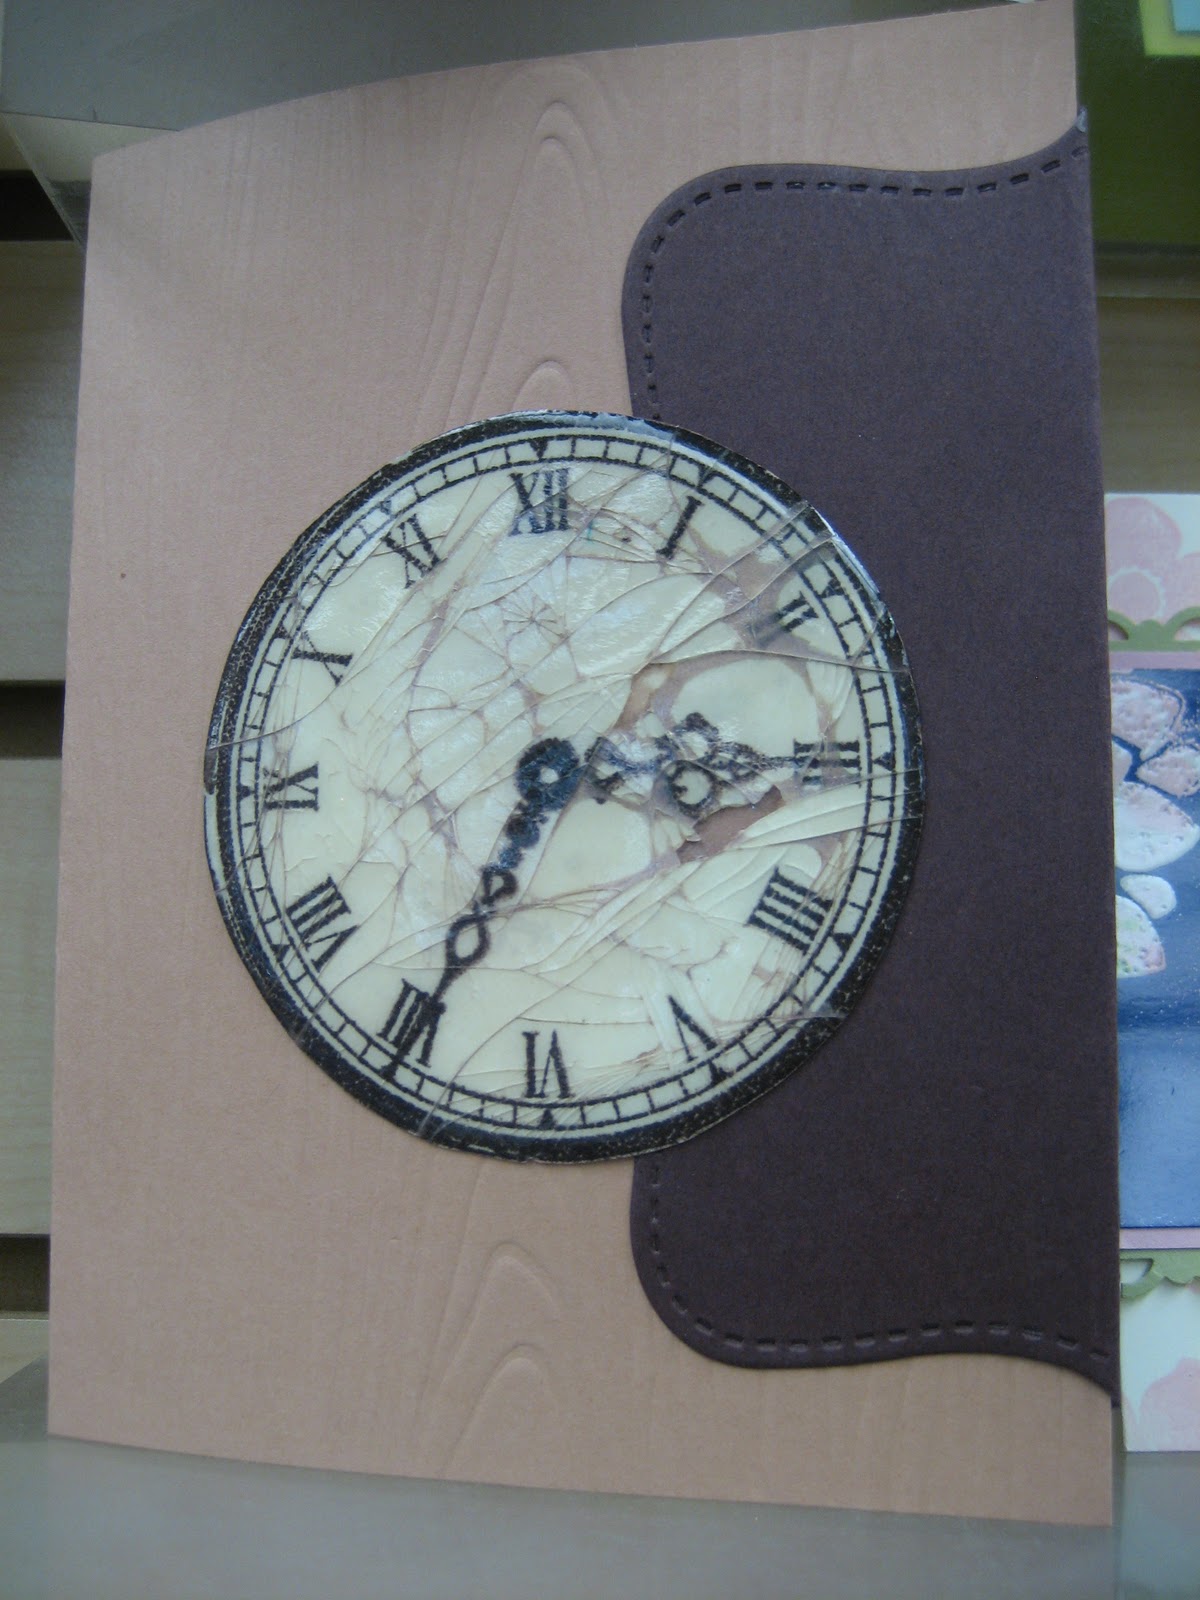
Cracked Glass


Supplies:

Sandy Lion Clock Face stamp set

PTI Wood Grain texture plate

SU! Sizzix Top Note Die

Vanilla, Dark Brown, Tan cardstock

Early Espresso, Versamark, distressing ink

UTEE

Sponge

Pop dots, sticky strip

1. Stamp large face clock on Vanilla cardstock and trim.

2. Apply Versamark to entire clock face.

3. Apply 1 layer of UTEE (Ultra Thick Emboss Enamel?) & place in pie plate. Heat from below until the UTEE starts to melt – then heat from above. This is done so that the large UTEE “grains” don’t get blown off the piece.

4. Let cool for a few seconds.

5. Repeat steps 2, 3 & 4 - TWO more times for a total of 3 coats.

6. Place clock in the freezer and while waiting assemble the card base as per example.

7. Remove clock from the freezer and bend piece to crack it. Rotate and bend so that the cracks are going in different directions.

8. If stuff falls off don’t worry - you can apply more UTEE, heat it again and re-crack or just go with it like in my close up below.


9. Add distress ink with a sponge.  I have to admit that I did damper my sponge a bit to get that "marbled" look beneath my cracks.

10. Assemble card base.

11. Add clock face to card using sticky strip or pop dots – glue stick will NOT work.


Emboss Resist


Supplies:

Flourishes Cherry Blossom, Thank You stamps

Kraft cardstock card base

Blushing Bride, Pear Pizzazz, Versamark ink

White Gel Pen

White Detail EP

1. Using Old Bag/Emboss Pillow rub all over KRAFT card base front.

2. Stamp Cherry Blossom and Thank You with versamark.

3. Add White EP –fine detail embossing powder is used whenever embossing words and fine lined images.

4. Heat and let cool.

5. Using dauber/sponge/blender pen add pink and green to the Cherry Blossom image.  This is what I call "quick" colouring and I don't worry about "colouring in the lines"!


6. Using White Gel Pen add lines around the border of the card front. 


Faux Metal


Supplies:

SU! Perfect Punches, Heard From the Heart stamp set

SU! Scalloped oval punch

Silver, Olive Green, Light Blue cardstock & Blue multi patterned paper

Olive Green Ribbon

Versamark

Detail Silver EP

Pop dots, sticky strip

1. Apply versamark to the SILVER cardstock paper.

2. Cover with Detail Silver EP

3. Heat

4. Repeat steps 1, 2 & 3 for a SECOND or even THIRD coat and while HOT press stamp image into it.

5. Let cool.

6. Punch out image using coordinated punch.


7. Assemble card as per example.

Note: If using a punch be careful not to apply too much embossing powder or the piece will be too thick and may not fit through the punch – in that case simply hand trim your piece.


Emerging Colour


Supplies:

SU! Fabulous Flowers, Punch Bunch stamp sets

SU! Scalloped Square, SU! Scalloped Edge punches

Strip of Glossy White, Vanilla card base, Pink matting strip, Green scalloped edge

Blushing Bride, Pear Pizzazz, Concord Crush, TOP BOSS tinted embossing ink

Detailed Clear EP

Pop dots, sticky strip

1. Randomly stamp pink flowers on VANILLA CARD BASE front.

2. Randomly stamp pink flowers and green stems on GLOSSY WHITE piece.

3. Using Old Bag/Emboss Pillow rub all over GLOSSY WHITE piece.

4. Using Versamark stamp Large Flower image randomly over GLOSSY WHITE piece.

5. Apply Detail Clear EP to GLOSSY WHITE piece making sure to cover all the large flower stamped images.

6. Heat and let cool.

7.  Apply dark ink to entire area using a swiping “direct to paper” method. Using Kleenex tissue (and a bit of spit) remove excess ink from the embossed flowers by gently rubbing the area.


9. Assemble card as per example.



Thursday, October 7, 2010

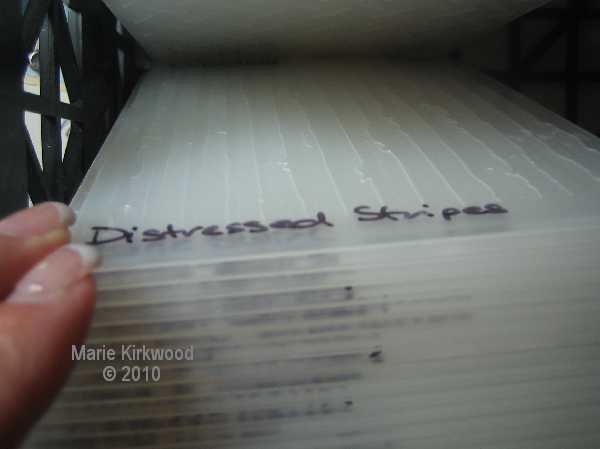
Embossing Folder Storage Idea

Storage - it's one of the biggest issues I have with papercrafting and all it's tools!

The other day I wanted my Swiss Dots Cuttlebug embossing folder and it took me 20 minutes to find it!

So I found a little mini milk crate, labelled my folders with a Sharpie marker, and alphabetized them by Designer.

Check this out:

Yes I know the folder names appear upside down - or so it would seem - but when I'm using them in a class or for a demo they are right side up.

Besides I can read them easily if I position myself over the crate while I flip through them!


This works for me - maybe it will work for you too!


Sunday, January 17, 2010

Using Classic Ink to Emboss with In Colours

I just came across THIS TIP from Cindy Lou - The Stamping Guru on heat embossing with classic ink on glossy paper.

To heat emboss you need to use an ink that the embossing powder will stick to - like versamark or craft/pigment ink. Classic ink dries too quickly on paper but not on glossy paper!

It's kind of the same idea as embossing on vellum when using your computer printer or classic ink - the ink stays wet long enough for you to add embossing powder and then heat!

It's so cool - I've never thought of doing this on glossy paper before but I can see how it would work.

Now this means that you can emboss with the new Stampin' Up! In Colours classic ink (since there is no craft ink in these colours).